CLICK HERE FOR FREE BLOGGER TEMPLATES, LINK BUTTONS AND MORE! »

Saturday, December 30, 2006

Love Grows

OK, I'm done making cards for the night. This is the other card I came up with tonight. I once again used the cuttlebug to cut out the scalloped circle. I figured this will give me my scallop fix until the new punches get here. I also embossed the hearts on the Loves Me Designer Paper. It looks like my creative juices are flowing again.

I ended up ordering the other embossing folders I have been looking for. There is only one place in town that carries the CB embossing folders. By the time I got my CB most of the ones I wanted were sold out. So right now I'm waiting on about 5 packages to come in. Since Tuesday is a federal holiday I won't see any of my packages until Wednesday at the soonest. And I have to go back to work Thursday. I guess I'll just have to keep playing with the toys I already have.

SEI Paisley Card

I just finished this card and I couldn't wait to add it to my blog to share with you all! I have seen so many cute cards on SCS using the Stampin' Up designer paper Rebecca and Sarah. Well, I didn't have any of that paper (I will be putting it on my next order) so I went to Hobby Lobby and found this paisley paper that is just my style. Plus it was on sale so I had to have it. The paisley is SEI Granpa's Attic paisley hanky 7-9923 and the striped paper is Grandpa's Attic suspenders 7-9927. I used natural ivory paper for the base of the card and I layered the SEI paper on basic black. I even got to use my Cuttlebug on this card! I cut out the photo tab and the tag. I may have gone a little over board with this one because I had so many things I wanted to play with.

I also wanted to let you all know that I love my new ATG! It is really big but everything I have used it on has stuck where I put it! I have had a hard time with mono because the layers always fall off the cards. I had gone to using double stick tape but I love the ATG so much better than the tape. You don't have to peel it off and stick it down which is time consuming. The ATG gives me more time to make cards and be creative. In case you want one, I bought my ATG714 from framing supply.com.

Friday, December 29, 2006

Hogs & Kisses


I only made one card tonight because the creative juices weren't flowing! I used a few sets I haven't played with in a while, Walk this Way and Alphabet Soup. I used my new Cuttlebug embosing folder Bloom Dots to emboss the teal background. I inked the Hugs & Kisses stamp with my marker and then I stamped an O from a small non SU alphabet set I have. So this is it for now.

I think I'm stumped because I have an idea for a baby card but I don't have that cuttlebug folder that I need to make it. It may not turn out the way I see it in my head but it is blocking all other ideas at the time.

The goodies are rolling in!

I was so excited when the postman rolled up and he had 3 packages for me. The first was from my upline Joann. This is what she sent me as a Christmas gift. I really do have the best upline ever. I am a hobby demo and don't really do many parties, probably only about 4 since I became a demo 2 years ago. Joann is always there to answer questions and lend a helping hand if it is needed.

Since I got some money for Christmas I just HAD to order a ATG gun. If you don't know about them you can find many threads on SCS about them. It is an adhesive gun. I haven't tried it out because it was delivered this morning. I wanted to post a picture of it because several people have been asking how big it is. I didn't have much trouble putting the tape in and I tested it out on a scrap piece of paper. I do plan to make some things after I finish posting this so I'll let you know how it works.

The next pictures are of all the Cuttlebug embossing folders I ordered from Happy Scrappin' Scrapbooking. I placed the order Christmas day and they shipped Dec. 26th. And the order arrived today- that was really quick! Here is what I got:

Bloom Dots


D'vine Swirl


Happy Birthday
Heart Blocks

Thanks
Then I ordered these from the dreaded bay! lol I have several other packages coming from there but these were the first to arrive!
Tiny Tags
Charms

Since I doubt any more packages will come today I guess I'll go play with these goodies! There is still a chance that Mr. Brown might stop by- he normally doesn't get here until between 4 and 6pm. I'll share if I create something good!

Thursday, December 28, 2006

I'm up and moving around... a little

I finally got up out of the chair today and did something. I had surgery Thursday and now I'm going stir crazy. I probably over did it today because it was the first time I have ventured out of the house. And before today I didn't get up out of the chair for more than about an hour. I had to go to the bank and of course I had to stop by Michael's while I was out. My wonderful mother-in-law got me a Cuttlebug for Christmas and I couldn't wait to try it out.
I have ordered some embossing folders and dies but I can't wait for them to get here. So I bought several other dies on my adventure today. I love the way you can just roll the die through and it cuts it out perfectly! I have also ordered some other goodies with my Christmas money so I'll post here when they get here.


This is also the first time I have had a chance to play with the stamp set SU sent demos for Christmas. I just love this set! I used bashful blue, regal rose, and sahara sand for this one. I also used my Cuttlebug to cut out the tag on the bottom right side. Since I am finally moving around again expect to see more soon!

Sunday, December 24, 2006

Home from Hospital

I just wanted to let you all know that I am home from the hospital. I had exploratory surgery and they took out my appendix. But they didn't find anything else. So I guess I'm back to square one. I just wanted to let you all know why I haven't posted any creations lately. My DH has been doing a great job taking care of me and maybe I can get him to help me get some stamping stuff down so I can post some things later. Merry Christmas to you all!

Saturday, December 16, 2006

Cutest Snowman Ever!


I was looking around on SCS the other day and I found SweetMissDaisy's card using the cutest little snowman stamp. I went straight to Addicted to Rubber Stamps and placed an order. Both stamps are by Inky Antics. I love ordering from Addicted to Rubber Stamps because their shipping is so quick. The order shipped Thursday and it came in the mail today! And I didn't even have to pay for shipping because of a special they were running. Now if we could just get SU to ship and deliver that quick.


So I started playing around with the stamps because I wanted to make some thank you cards to send to people who get us Christmas gifts. I like to have them on hand so I can send them out right away. I also wanted to use the snowman but move away from the Christmas colors. So this is what I came up with. I used Cool Caribbean and Gable Green. You can't see it real well in the picture but I stamped the words under the last snowman on the right. I watercolored the snowman with Cool Caribbean, Gable Green, and Apricot Appeal. I need to add some glitter somewhere on this card but I was so excited about it that I wanted to add it to my blog!

Does anyone else have trouble taking pictures of their cards? I get so frustrated when I have to take pictures because I have to take 15 or so pictures to get one good one. My husband normally takes them for me because I'm so bad at it. The color is wrong or they are all blurry! I get so mad when I have to keep going back to make more and more pictures to get a good one.

Wednesday, December 13, 2006

Wedding Card

My friend asked me to make a few wedding cards for her. I was browsing around on SCS and found a card I really liked! Inkpad made it and it was so cute. I went to the stamp room and I didn't have all the stamps she used so I made a few modifications. This is what I ended up with. I think it turned out really cute. I just love these colors together, burgundy and sage. You can't really see it but I stamped the hearts on the sage paper. What do you think?

Sunday, December 10, 2006

Sucker Cards

I have seen so many of these cute little sucker cards and I just had to make one. I went and bought some sucker sticks instead of putting a real sucker on it so it wouldn't be too heavy to mail. I am thinking about making these as Valentine cards so I didn't want them to weigh too much. I just love this new designer paper from the SU Winter mini. I used the only circle punch I had to punch out the "sucker." I wish I had one that was a little smaller but I can't cut a straight circle so I just went with it.

I was also at a loss on what kind of adhesive to use to keep that little stick glued down to the paper. So, I decided to give my new UHU sample a try. I used the twist & glue. I put a little on the stick to glue the "sucker" on and I also used it to glue it to the page. I love the way you have the option to use a little tip to apply the glue or you can open it all the way to have a big flat tip. Of course I used the little tip for this project. It is in the process of drying right now but I'll let you know if it stuck. I live in the south and I have a hard time finding things that will stay stuck in this humidity.

I also made another sucker card but I think something is missing from this card. I feel like it needs something in the top right corner but what? Do you have any suggestions? I don't want it to be too much. I still want the sucker to be the focus but it looks a little bare.

I almost forgot to show you all what I got! My friend Trace gave me this cute little paper scrap vac! It is so cute. I used it tonight to vaccum all the little scraps and the pop up dot backs. Thanks Trace!

Big Pieces- Pink


I've been playing with Big Pieces again. I saw this card on SCS. Several people had made one like this and I wanted to make one too. I love this new set. I have Little Pieces and it goes together great. I used my new little EK punch to add the circle on the ribbon. I'm not sure I'm crazy about it but I guess it works. I made this card at 1:00 am today. I haven't been in the stamp room to play today but I plan to sometime after I get more laundry started. I went to Walmart and picked up some sucker sticks to make another card. I'll post more of my creations later if I get to stamp!

Saturday, December 09, 2006

I've been stamping ALL day!

Today I went to a friend's house and we stamped all day long! I got there around lunch time and I didn't get home until 6:30. She is making Christmas cards with two snowmen on them. She just got married this summer so she wanted to do a wedding snowman couple on the card. They really turned out cute! We were so sick of snowmen when we finished that we were delirious! We were coming up with some silly snowmen cards to make for different holidays! We were laughing so hard that I told her I thought we needed to stop for a while! I also finished all my Christmas cards. I decided to do the clear snowflake cards I posted earlier. They turned out so great! I got some white Stazon and I was tickled with how quickly that ink dried on the transparencies! They will be going in the mail Monday.


Today was the first time I have had a chance to play with my new stamps. I had looked at SCS and found a few cards that I wanted to CASE. Here is the first one. The original was posted by coribravo. I used Big Pieces, Little Pieces, and Happy Everything. The colors used were burgundy, mellow moss, and apricot appeal. I love this card and I will using this card soon!


I also picked up some of the snowman paper from Basic Grey today! I just love that paper. I stuck it in a clear mug from the Dollar Tree. I plan to make a snowman soup packet for my room mother. She is always doing great things for my class and I wanted to give her a little something for Christmas. I'm not sure if I'm going to stamp something to go inside or if I will just stamp a tag and some other things to go with it.

While shopping I also ran across the EK punch you see here. I have gotten most of my punches from SU but I just love this one so I got it! It was a little different from the other punches I have because the punched out piece doesn't come flying out of the bottom.

Thursday, December 07, 2006

My goodies are here!


My goodies are here! I can promise some new posts this weekend. I just got in tonight and the box was on the front porch. Too bad I have to work tomorrow. If I didn't have to work I'd be cutting stamps right now. I got several new sets, paper, stamp pads, reinkers, ribbon, and the little marker spray thing. I can't wait to give it a try! I'm going to Trace's house this weekend to stamp but I don't think I'll be able to wait until Saturday to break into my new stuff! Check back soon for some new cards!

Wednesday, December 06, 2006

I Love Snowmen!

My good friend Stephanie asked me to make something for her mom to give as a dirty Santa gift. She wanted me to stamp something with snowmen on it. I love snowmen so this was right up my alley! I made a set of cards and a matching notebook.


For the "snow" I tore white paper and then added glitter to the edge that was torn. I used not quite navy and white. I just love the dark blue with snowmen!

For the notebook I just used Crystal Effects to glue the paper down to the composition notebook. I'm still trying to figure this out so I don't end up with CE on everything. I guess a little patience would help but I can't seem to manage that when I get on a roll. I get so excited about getting something done that I can't stop to wait on the CE to dry! I stamped some snowmen and added some Primas on two of the snowmen. This turned out so cute I might just have to make some more to give as gifts myself!

Sunday, December 03, 2006

Busy as a Bee

I have been busy today! I finally finished all my Christmas shopping. I did most of it in November but I had to wait until after payday to finish the rest of it. I went to Target and Kohl's and got something for the rest of the people on my list. I came home and wrapped it all so it is ready to be delivered.


I picked up a gift card and I knew I had to decorate a tin to put it in. I ordered a bunch of these from specialtybottle a while back so I have plenty of gift card tins to decorate. Since I have wrapped everything with snowman paper I knew I had to put a snowman on the top of this one. I stamped white snowflakes on night of navy paper and put it on the top. I also used the tag punch and stamp to make the snowman tag. This one was quick and easy.

I also made these little post it note holders for all the teachers on my grade level at school. These were so easy to do too! I used Headline Alphabet and Looks Like Spring. I wrapped the patterned paper and put it inside the RSVP pen.

I'm still waiting on Mr. Brown so I can make my Christmas cards. He should be here Thursday so it looks like I'll be making them next weekend!

Saturday, December 02, 2006

Playing with Peaceful Wishes


I borrowed Peaceful Wishes and I have been playing around with it tonight. I love this set but I don't know if I would use it for anything other than Christmas cards. Since I know what I'm going to make for my Christmas cards I hate to buy it now. It was one of the sets I thought about buying when I purchased Lovely as a Tree. If it is still around I'll probably use it next year. However, I did get to play around with it and I'm in love with the simplicity of it!

On the first card I used glossy cs and stamped the images on it. Then I used a white crayon and colored around the image so it would look like snow on the branches. I then used brocade blue and sponged it all over the entire piece of glossy cs.

For the second card I used naturals cream to stamp on instead of white. It gives it more of an antique look I guess. I also did the heated ribbon on the organdy ribbon. Just heat it up with your heat gun and it makes it curl up on the edges. I love the way this heated ribbon looks on a card!

I must say that I love the snowman ornaments that Debbie posted on her blog. I finally got up the nerve to give it a shot and I love the way they turned out! Check out mine!


I had a hard time shading with a sharpie around the snowman but my DH has some stuff in his hobby desk to help me out. When I tried to color it to shade it would always look too dark and I thought I would have to throw it away and start again. I was so wrong!

Here are a few tips he gave me. I thought I would share them with you in case you are "shading" challenged like me! First he told me to ink up the end of a q-tip with the sharpie. Then rub the q-tip on a piece of paper until it almost looks like it won't color any more. It will be really light. Then you shade the area you want to add color to. This makes the color lighter than the original color of the sharpie. Then you use a cosmetic applicator (I got mine at Walmart) and blend in the color.

Now, what do you do it you mess up? Don't throw it away! Raid your husband's car stuff and find this: Mother's Mag & Aluminum Polish.
Put a tiny, tiny, tiny, tiny bit on an cosmetic applicator and rub over the sharpie mess ups! It takes it right off and leaves the Stazon on the domino! I was so excited about this. I recruited him and he helped me make all of my ornaments.
Thanks so much for showing us how to make these on your blog Debbie! I took one to school last week and everyone loved them. I have used a whole box of dominos making these and now I can't find any more white dominos at my Walmart. I'm going to have to go on another shopping trip tomorrow so I can find some more!

Wednesday, November 29, 2006

I need white Stazon

OK, the white craft ink never dried on the transparencies. I have waited a few days and it is still wet and smears when I touch it. I have decided that the clear snowflake card will be the ones I make for my Christmas cards. Now I just have to get the white StazOn to finish them.

I'm placing a SU order tomorrow so I'll be getting lots of new goodies. I can't wait to get the order. I'm getting Big Pieces, Happy Everything, Sweet on You, and Love Matters. I'm going to order several new colors of paper and ink that I don't have yet. All my friends who stamp are amazed at the number of stamp pads I have but I never can get enough. I'm also getting ideas together to have a stamping party at the school where I teach. I have gotten a lot of ideas from SCS and I plan to do several Valentine's Day cards. As soon as I get the supplies I'll take pictures and post them to my blog. It will probably take a few weeks because the UPS man never gets here fast enough with my SU boxes! I guess I'll have to place the order before I start stalking the UPS man!

Sunday, November 26, 2006

Clear Snowflake Card

I finally made a card with a transparency. I didn't have any white Stazon so I tried my white craft ink. I have no idea if it will ever dry but I stamped it and left in on my stamping desk. I guess I'll check it tomorrow when I get home from work to see if it is dry.

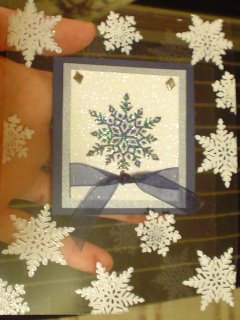
The night of navy mini card is just that, a mini card. When you open the transp. card it says Holiday Greetings, which I stamped in silver. I also embossed the white cs with the navy snowflake stamped on it. I used Versamark to cover the entire white sheet and then embossed it with the glitter embossing powder (you can't really see it too well in the first picture so I added the second one where it shows up a littler better). Then I tied the navy organdy around the bottom of the white cs. I attached the white cs to the silver cs with those cute little diamond shaped silver brads. I bought them a while back because I just had to have them but I never used them because I didn't want to use them up. Isn't that silly? I even do that with my designer paper because I don't want to mess it up! I have been doing a little better using all my patterned paper.
If the craft ink doesn't dry I will be getting the white stazon because I'll be making some of these to send out at Christmas cards. I am just thrilled with the way they turned out. I am a teacher and I have a huge box of overhead transparencies that I bought to keep at home to write on when I do my lesson plans. They have been sitting in the craft room gathering dust so I have found a new use for them.
I have been trying to come up with some cute ornaments that I can add to my Christmas presents too. I have been looking at my new Papercrafts magazine and they have some cute things in there. I have also been thinking about trying to make some of those paper stars that have shown up on SCS here lately. I should have ordered some of those microscope slides to make ornaments with but I didn't. I may have to buy some dominos after I get paid this week and try to make some of those. That would be something new for me too! I'll post whatever I make here so you can give me some feedback!

First Glitter Window


I think something might be missing from this card. It is missing that WOW factor I was looking for. This is my first glitter window and I think it is a little more glittery that I though it would be. Any suggestions on what I might do to it to make it a little better?

It was a pain getting the tag punch straight on the green cs. I just have to keep telling myself that it is hand made! lol I'd love to hear your suggestions on something I might add to this one!

Christmas Present I'm Making for Mom

Mom, if you are reading this look away!!!! lol


I made the cutest little card tin for my mom for Christmas. I was looking around at the local scrapbook store this weekend and ran across the cutest paper. My mom collects elephants and I have been looking for something like this to make her a tin for cards. Everything I used on the tin is BasicGrey. The elephant paper is Oh Baby! Girl Macy and the purple paper on top is LilyKate Rain. I was tickled to find the fibers that perfectly match the paper (Oh Baby! Girl Coordination Fibers). The fibers were wound on a card and there were several different ones. I used the wider pink to trim around the top lip of the lid. Then I tied the rest of them on the handle. I wish I had bought more so I could cover the entire handle with them. But the fibers were a little high for me to buy several. I just couldn't resist the combination of the paper and fibers for this cute little tin!

I plan to use the rest of the paper to make her some monogram cards. She is always sending little notes to everyone so I thought this would be perfect. I'll post a picture of the cards once I get them made.


Thursday, November 23, 2006

I learned something new today.

I have seen so many of these cute cards on SCS. I love the way the designer paper is used for the dress but I had no idea what it was called or how to do it. I found out it is called color piecing. I just stamped the image on the designer paper and then just cut it out and glued it down on another stamped image. I had to give it a try with the prego lady and I'm pleased with the way it turned out! I just love learning new things!

©Stampin’ Up!® 1990-2006

Monday, November 13, 2006

More Sass

I've been playing with Sassy Stems again tonight. I even pulled out the designer paper to go along with it. On the first card I used Little Pieces to stamp the circles on the pumpkin pie paper. Then I pulled out the Prismacolor Pencils to color in the images on both of these cards.
©Stampin’ Up!® 1990-2006

The second card is the one I used the designer paper on. This is some paper I got from a secret sister swap and this is the first time I have used it. I don't normally get the patterened paper out because I hate to cut into it! This is the double sided paper so I used one side for the bottom of the card and the other side is around the stamped image. I also used the little flower from Simply Said and colored it in with the white gel pen.

I think I have made plenty of Sassy Stems cards. I guess it is about time for me to decide which cards I'm making for Christmas. I did mail my Thanksgiving cards today. It normlly doesn't take too long for them to get to where they are heading because most of my family lives close by. I guess this is all for tonight!

Sunday, November 12, 2006

Sassy Stems

Sassy Stems is my favorite new set in this year's SU catalog. I haven't had that much time to sit down and play with it so I made a few cards with it tonight. Of course, neither of these are original ideas but I love the way they turned out anyway!


Can you tell I love to add black to cards? I think it gives these two an extra something. I wish I had the black organdy ribbon to go on the first card. It would probably look better if I could punch the holes straight to put the brads in. I just haven't gotten the hang of that yet, even with a straight edge.
I made this second card for a good friend of mine. I even doodled around the edges of the stamped image. I used Prisma color pencils to color this one. I have been having trouble with the black ink running when I use the WCC. The card I posted first looks great tonight. But when I go look at it tomorrow it could be a different story. If that happens I will take a picture so you can see what I'm talking about. I have been told to use Stazon but I always forget until after I start to color the image. We'll have to wait and see what happens. Until in the morning...
©Stampin’ Up!® 1990-2006

Snow, snow, and more snow

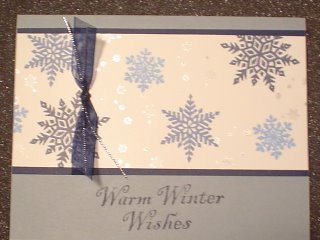
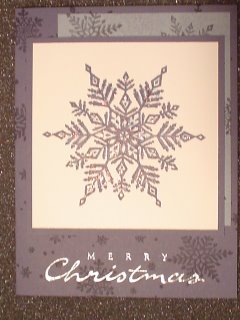
OK, I'm back from the stamping table and here is another snowflake card. I made this one with all the blues that I have. I also stamped the little snowflakes in silver. This card was super quick and I like the look of it.


I also went back and added that silver embossing on that other card I did before. What do you think? It really pops out huh?

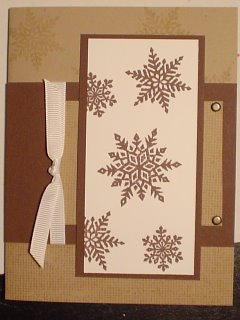
Here is a brown snowflake card I made several weeks ago. I like the brown too. I have such a hard time making decisions. Can you tell? I guess I'll have a big selection to choose from.

©Stampin’ Up!® 1990-2006


Violet Snowflake


I saw a beautiful card on SCS today and had to make one. Why is it that my cards never look as stunning as the cards I try to CASE? I love the color combo on this one. I am still playing around with different color combos for my Christmas cards. I don't really want to go with the classic colors so when I saw this I thought it was perfect. I stamped the snowflake with Vintage Violet and then put some glitter over it. I like the way it sparkles. I haven't ever done a Christmas card with snowflakes so this just might be the one. Who knows?!?! I think I may go back and add a Christmas saying at the bottom and emboss it in silver. That would be really pretty with the colors. Plus, silver is my favorite! So much better than gold. lol

I always end up making several different card designs for my Christmas cards. I guess I get bored and can't make 25-30 of the same card unless someone wants to pay me to do it. So if you get Christmas cards from me you may or may not get one of these. I think I'm going back to the stamping table to play with the snowflakes some more.

©Stampin’ Up!® 1990-2006

Wednesday, October 25, 2006

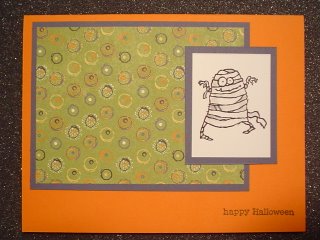
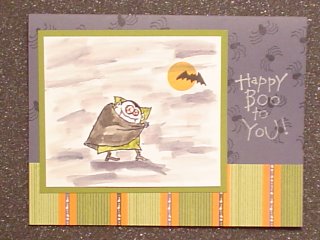
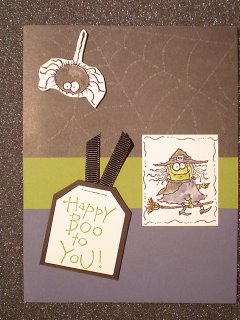
Booglie Eyes- My Favorite Halloween Set

I wanted to upload a few more Halloween cards that I made to send out. It is almost time to move on so I want to share these first. I just love this Halloween designer paper! I know I need to order the Christmas paper.

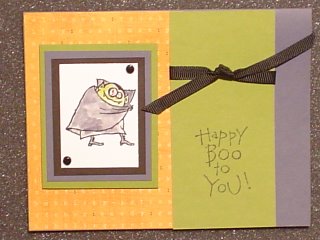
The Happy Boo to You card with dracula has old olive, vintage violet, basic black, and designer paper. I also used black ribbon and brads. I colored the little guy with WCC.


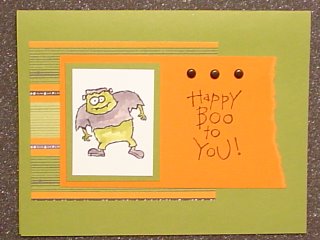
Frank Happy Boo to You: Old Olive, Pumpkin Pie, and Designer paper; black brads; image colored with WCC.


This one is my favorite! I call it mummy dots! I used pumpkin pie, vintage violet, and designer paper.


Here is another dracula card. I used vintage violet, old olive, and designer paper. I stamped a circle from Little Pieces and one bat from Halloween Backgrounds to make the moon. Then I used a reinker and watercolor brush to make the "fog."


The witch card: Vintage Violet, Old Olive, and designer paper; Tag Punch, Black ribbon. I drew the squiggles around the witch. I think I might be squiggle challenged but I like the way this one turned out. There is no way I could draw something that looks like a stamp like some people do. But I guess I can draw a squiggle line around it.

Images © Stampin’ Up! ® 1990-2006