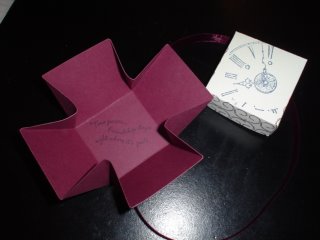
Box Lid: Take a 4x4 piece of card stock and score just shy of 1 inch on all sides and fold. You will have 4 little boxes in each corner. Cut along just one of the score lines until you reach the next score line on each corner. Now you will have flaps that can fold inside and hold your lid together. Use Sticky Strip to ensure the lid stays together. If you are going to stamp on the lid, be sure to do this before assembly.

Finish your box by securing with ribbon.
Now you have a fun 2x2 box that can be a gift box and card in one.
Images © Stampin’ Up! ® 1990-2006


1 comment:
Welcome to the world of blogging! I bet you're going to love it! I really like your Halloween designs - keep showing your cards and paper crafts on your blog and you will start to get a following.
Have fun!
Post a Comment